Thursday, January 6, 2011

Inexpensive Wall Art

I have a huge empty space on one of the walls in my living room that I have been looking for the perfect art for. Well, I came to the conclusion that I just couldn't afford a large enough piece of art for that space. SO, I came up with something else. Now, this is not my idea, it is all over the blogosphere, but I did make it my own by adding pictures of my kids and some "family rules". I did not include step by step pictures because it is SO easy!

Here's what you do:

I purchased a piece of plywood and cut it into 9 12x12 squares (your local hardware store might even do this for you if you ask nicely!)

I painted the edges of my plywood squares with a chestnut spray paint, I have also seen this done with ribbon.

Use a spray adhesive to adhere a 12x12 piece of scrapbook paper to each square. I tried to use modge podge at first but it bubbled and I wasnt happy! On 3 of the squares I had 2 of my favorite pictures blown up to 12x12 and a Subway Art file I got from Sassy Sanctuary.

Attach pictures hangers to the back and VIOLA! Instant and CHEAP wall art! I have to say...it looks GAWGEOUS!!!!!!!!


Now, when hubby gets home he can see just what I was trying to explain to him. He asked me over and over why I was hanging squares of plywood on the wall. You would think after all this time being married to me he would learn!


Tuesday, January 4, 2011

Sonlight Core K Week 1

As soon as our box from Sonlight arrived the kids were begging to get started. We really enjoyed our first week of homeschool!
Supplementing with the curriculum this week, to go along with the Usborne Children's Encyclopedia reading on dinosaurs, we will be completing a small unit study to extend more on that topic. I borrowed some of the ideas from Homeschool Share and Enchanted Learning to complete a lapbook on Dinosaurs. While I am on the topic of Enchanted Learning, this is a subscription site. I debated over and over again on paying the fee to join ($20) because of the wealth of information you can find for free online, but the more I searched the more I decided that this site is well worth the $20 subscription fee. They offer a ton of materials for homeschoolers and teachers alike.

Books Used
If the Dinosaurs Came Back by Bernard Most
Bones, Bones, Dinosaur Bones by Byron Barton
Raising Dragons by Jerdine Nolen
Dinosaurumpus! by Tony Mitton
The Magic Schoolbus In the Times of Dinosaurs

Homeschool Share recommends the book What Really Happened to the Dinosaurs by John Morris and Ken Ham, I just want to add here that I did check this book out at the library and was very disappointed. Not only was it confusing for the kids to understand, I didn't understand much of it either. It contradicted what we had read in the Usborne Encyclopedia and it talked a lot about Evolution and how the dinosaurs lived over 100 million years ago. After reading just a couple of pages, we decided to skip it all together.

This was our first lapbook experience, and the kids really seemed to enjoy it. It was really great how they were able to share what they learned with Daddy afterwards.

Materials Included
  • Read the creation account in Genesis 1:1-31. List what God made on each day and determine what day God made dinosaurs. Flip Flap Book
  • Discuss Paleontology and completed large dinosaur puzzle after going on a "hunt" for the pieces.  Paleontologist matchbook.
  • Make a paper mache Dinosaur egg and then hatch it later (mommy snuck in a toy dinosaur when they werent looking)
  • Discuss dragons and dinosaurs.  How do the "dragons" in this story seem like dinosaurs?
  • Dinosaur Book We colored the pictures on the first page and cut them all out to make our cover, then discussed and colored the other sheets to include in the lapbook.
  • Dinosaur Pop Up Book
I have a photo printer at home, so any of the "big" projects like the fossils and the egg, I printed small pictures for them to include in their lapbook as well.

And here are the pictures of our completed lapbooks


Also, beginning this week, we will start collection items to make a Diorama of the Boxcar Children later. As we read the book we will note things they had in the boxcar and what the area around them was like. We also have The Boxcar Children Cookbook and will be making some of the recipes as we come upon the different foods they ate in the book.

For Science, we were very lucky that the Lunar Eclipse happened around the same time we read about the Earth's rotation, we viewed a video of that Here on the NASA website.


Monday, December 20, 2010

Homeschool Beginnings.....

After much prayer and discussion we have decided to homeschool. I am very excited about the curriculum I have picked out. We chose to use Sonlight Core K and supplement with additional activities to extend the core out. After searching and searching and searching for a website that had supplements to Sonlight Core K with no avail (I did find a couple, but they were not what I was looking for) I decided to take the plunge and use resources from all over and do it myself. So, along with our normal crafty posts (which have been severely lacking lately-sorry) I will be posting our homeschool adventures in hopes that it might help someone else as well! I hope that anyone who is considering homeschooling, who is currently homeschooling with another curriculum, or who is using the Core K will enjoy what we are doing and give me feedback and ideas as well!

Monday, November 22, 2010

Allowance and Banks

A few years ago hubby and I were sitting around discussing our kids and how we wanted to teach them about the value of money. We completely agree with the idea of a reasonable allowance to teach them some basic money skills. As the kids get older they tend to ask more and more for "things". I can not count on both hands how many times I have been asked to purchase something with which my answer has been "No, I don't have any money", with a response from Aiden "Well, use your debit card!". This is NOT how I want my kids to think about spending and the use of money. I only wish my debit card was that magic!

A while ago I saw this bank that I just thought was PERFECT for teaching them some very basic money skills. It had 3 sections, one for saving, one spending, and one giving. I was excited! I just knew this would be a great idea for our little beginners! Well, when we decided to start I ran off to this particular store to purchase one of those banks, and came back empty handed. They did in fact still carry it, but being the frugal mommy I am, could not in my right mind imagine paying the $20.00 they were selling it for! Especially since the little stickers were barely hanging on by a thread. I could make something with the supplies I had on hand and it be MUCH cuter! At this point, just imagine the eye rolling from hubby that ensued! I was on a mission!

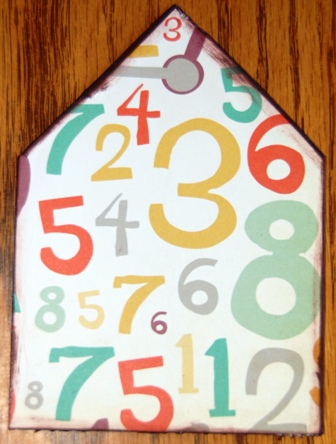
The first thing I needed was a template. You would think a simple house template would be easy to find with an Internet search, well not as easy as I thought, so I came up with one of my own. I had big ambitions at first of this cute little chimney on top of each house, but I quickly decided these houses did not need a chimney. You can add that if you wish =) I printed this at 120% on my printer so that it just fit on an 8.5x11 sheet of paper.

Cut out your template and then cut each individual piece onto a sheet of chipboard.


Enlist a little help from your children at this point. Mine are always eager to get a little messy with mommy! I use Aleene's Tacky Glue on EVERYTHING! The kids went hard to work dabbing a little glue (or a lot in their case) onto each chipboard shape. Just an FYI that it took me a long time to figure out- I used to purchase this glue at my local scrapbook store, or box chain like HL or Michaels until I found the giant bottle at Walmart for less than half the price! I will never buy it anywhere else again.
Please don't judge the messy house in the background!

Place each chipboard piece down on the BACK of your favorite piece of scrapbook paper. If your paper has a design you want to face in a certain direction, now is the time to check your positioning!

Using your scissors, cut each piece out. I don't worry too much about perfection at this point. Sandpaper does wonders for rough edges and gives it a little character!

I do, however, like to ink the edges of most everything. I think it gives it a finished look that makes the piece pop. I prefer the tiny Cat's Eye ink pads, they are inexpensive and can be purchased in many colors.

Now, I don't have any pictures of the next step, but I think it is pretty self explanatory. On one of your ROOF pieces, cut a rectangle with your exacto knife large enough to "deposit" and remove your money. I started to try to rig up some type of removable bottom, but figured since this was going to be handled by my children, it needed to have as few removable pieces as necessary.

Use your Aleene's glue on each edge of the chipboard and press them together. You only have to hold it for a couple minutes before the glue dries enough for you to move on to the next piece.

Decorate it with any embellishments or stickers you have on hand, and here you go!


Aren't those tiny clothes pins the most darling thing you've ever seen? I LOVE them!


Friday, November 12, 2010

Painting and Glazing Furniture

If you have never visited the blog All Things Thrifty, you need to! The have the most amazing ideas for home accesories and decor. One of the things Brooke "specializes" in is revamping old furniture. After spending more time than I should have drooling over the projects she has completed, I decided to take a stab at it myself. I have to say, becuase this was my first time, I did learn a few things along the way. While I am happy with the finished project, I will still do some of the things I did differently the next time. Yes-I did say next time, I know my hubby is just cringing when I say that!

We have had this entertainment center since we got married and moved into our first home. The previous owners did not need it and left in in the house when we bought it. It is a great entertainment center, but since I am in the mood to just totally redo the decor in my home, it was my first victim! It helped to convince hubby to let me try something completely new becuase he *thinks* he is going to be getting a new tv soon and we will be getting rid of this all together then anyway.

So, here she is. I did forget to take the picture before we took off all of the doors. Please ignore the mess!


I followed the directions from All Things Thrifty and primed it with Kiltz spay primer. Lesson #1: Purchase way more primer then you think you need! I originally bought 2 cans, and then mid project rushed back to Walmart and bought 3 more!


Then I sprayed on the paint I purchased. It was a slate grey color that I thought would go well with our living room decor. Lesson #2: You definatly need more paint then you think! I used 6 cans.

After the paint dryed is where things got sticky. Even though I read and reread the directions to glaze, it just didnt turn out like I expected. I am wondering now if I either 1 was not doing it correctly or 2 it just wasnt the right type of furniture for what I was trying to do. But, overall the mocha glaze did give it some brown undertones and really gave it some character.

Her eis the finished project. I really dont think this picture is good-it doesnt really do it justice at all. And, I wish I would have thought to take it BEFORE hubby put the tv back in . I'm not really sure what that brown stripe at the top inside is. When I saw this picture I immediatly ran in the living room to make sure I didnt miss an entire piece at the top, but I didnt. WEIRD!


Here is the before and after:


Sunday, October 17, 2010

E-Mealz

These days I am all about organization. With 4 small children, going to school full time, and my many other duties, organization is the only way I feel half way sane on a day to day basis.

BC (Before Children) I use to sit down every week and plan out our menu and shopping list. It saved a lot of stress each evening when it came time to make dinner. Well, as time has gone by I have gotten worse and worse with meal planning. I still go grocery shopping, spend tons of money, and then stress every night because I cant figure out what to make for dinner. So, then a lot of times we end up eating out, which costs us even more money. And honestly, I just dont have the time to sit down and do this every week!

Well, seeing as our house payment went up almost $500 a month, we have to be more careful then ever about where our money is going. When I cam across E-Mealz I was a little intrigued, but a little skeptical at the same time. When I saw a coupon code for a discount (DAVE) I decided to take the plunge and try it out. The idea is simple. Each week they plan a menu for you, main dish and sides included. Each meal is very well rounded, and very easy to make. What makes it even better though, is they plan the menu based on what is on sale at the store you shop at. Hallelujah Kroger was on that list and away I went! We have been doing this for 2 weeks now and I am hooked. You would be surprised how much stress is lifted off of my shoulders because of one simple service. The stress relief alone if enough reason to jump right in, but we are saving A LOT of money in the process. It seems silly to spend $5 a month, but the money that we save having a plan, shopping the sales, and not going out to eat way over shadows that measly $5.

Check them out!

SAVE TIME AND MONEY WITH E-MEALZ MEAL PLANS

Fleece Winter Hats

When I saw this post at From An Igloo I immediatly wanted to rush to the fabric store, grab some fleece and get sewing! It took me a little longer than I cared to get around to making them, but seeing as we are still in the 80's here during the day, I'm pretty sure I got them made in plenty of time for winter!


These were surprisingly easy to put together. The hardest part for me was getting the dinosaur spikes onto Aiden's in the right postitions. I got both of them done in one afternoon WITH all 4 kids running around, so it cant be too bad right?

They LOVE them. Kylie went to bed with hers last night and has already adorned it this morning. Hopefully, they will make it to winter!

BUT...when I saw this for $4 in our Target ad this morning...

My heart did drop a little. Oh Well! I still think mine are cuter AND mine cost probably $4 TOTAL for the two WITH fabric left over! I might even have enough to make two mini ones for the babies =)