
Monday, December 20, 2010
Homeschool Beginnings.....
After much prayer and discussion we have decided to homeschool. I am very excited about the curriculum I have picked out. We chose to use Sonlight Core K and supplement with additional activities to extend the core out. After searching and searching and searching for a website that had supplements to Sonlight Core K with no avail (I did find a couple, but they were not what I was looking for) I decided to take the plunge and use resources from all over and do it myself. So, along with our normal crafty posts (which have been severely lacking lately-sorry) I will be posting our homeschool adventures in hopes that it might help someone else as well! I hope that anyone who is considering homeschooling, who is currently homeschooling with another curriculum, or who is using the Core K will enjoy what we are doing and give me feedback and ideas as well!
Monday, November 22, 2010
Allowance and Banks
A few years ago hubby and I were sitting around discussing our kids and how we wanted to teach them about the value of money. We completely agree with the idea of a reasonable allowance to teach them some basic money skills. As the kids get older they tend to ask more and more for "things". I can not count on both hands how many times I have been asked to purchase something with which my answer has been "No, I don't have any money", with a response from Aiden "Well, use your debit card!". This is NOT how I want my kids to think about spending and the use of money. I only wish my debit card was that magic!
A while ago I saw this bank that I just thought was PERFECT for teaching them some very basic money skills. It had 3 sections, one for saving, one spending, and one giving. I was excited! I just knew this would be a great idea for our little beginners! Well, when we decided to start I ran off to this particular store to purchase one of those banks, and came back empty handed. They did in fact still carry it, but being the frugal mommy I am, could not in my right mind imagine paying the $20.00 they were selling it for! Especially since the little stickers were barely hanging on by a thread. I could make something with the supplies I had on hand and it be MUCH cuter! At this point, just imagine the eye rolling from hubby that ensued! I was on a mission!
The first thing I needed was a template. You would think a simple house template would be easy to find with an Internet search, well not as easy as I thought, so I came up with one of my own. I had big ambitions at first of this cute little chimney on top of each house, but I quickly decided these houses did not need a chimney. You can add that if you wish =) I printed this at 120% on my printer so that it just fit on an 8.5x11 sheet of paper.
Cut out your template and then cut each individual piece onto a sheet of chipboard.


Enlist a little help from your children at this point. Mine are always eager to get a little messy with mommy! I use Aleene's Tacky Glue on EVERYTHING! The kids went hard to work dabbing a little glue (or a lot in their case) onto each chipboard shape. Just an FYI that it took me a long time to figure out- I used to purchase this glue at my local scrapbook store, or box chain like HL or Michaels until I found the giant bottle at Walmart for less than half the price! I will never buy it anywhere else again.
Please don't judge the messy house in the background!

Place each chipboard piece down on the BACK of your favorite piece of scrapbook paper. If your paper has a design you want to face in a certain direction, now is the time to check your positioning!

Using your scissors, cut each piece out. I don't worry too much about perfection at this point. Sandpaper does wonders for rough edges and gives it a little character!

I do, however, like to ink the edges of most everything. I think it gives it a finished look that makes the piece pop. I prefer the tiny Cat's Eye ink pads, they are inexpensive and can be purchased in many colors.

Now, I don't have any pictures of the next step, but I think it is pretty self explanatory. On one of your ROOF pieces, cut a rectangle with your exacto knife large enough to "deposit" and remove your money. I started to try to rig up some type of removable bottom, but figured since this was going to be handled by my children, it needed to have as few removable pieces as necessary.
Use your Aleene's glue on each edge of the chipboard and press them together. You only have to hold it for a couple minutes before the glue dries enough for you to move on to the next piece.

Decorate it with any embellishments or stickers you have on hand, and here you go!


Aren't those tiny clothes pins the most darling thing you've ever seen? I LOVE them!

Friday, November 12, 2010
Painting and Glazing Furniture
If you have never visited the blog All Things Thrifty, you need to! The have the most amazing ideas for home accesories and decor. One of the things Brooke "specializes" in is revamping old furniture. After spending more time than I should have drooling over the projects she has completed, I decided to take a stab at it myself. I have to say, becuase this was my first time, I did learn a few things along the way. While I am happy with the finished project, I will still do some of the things I did differently the next time. Yes-I did say next time, I know my hubby is just cringing when I say that!
We have had this entertainment center since we got married and moved into our first home. The previous owners did not need it and left in in the house when we bought it. It is a great entertainment center, but since I am in the mood to just totally redo the decor in my home, it was my first victim! It helped to convince hubby to let me try something completely new becuase he *thinks* he is going to be getting a new tv soon and we will be getting rid of this all together then anyway.
So, here she is. I did forget to take the picture before we took off all of the doors. Please ignore the mess!

I followed the directions from All Things Thrifty and primed it with Kiltz spay primer. Lesson #1: Purchase way more primer then you think you need! I originally bought 2 cans, and then mid project rushed back to Walmart and bought 3 more!

After the paint dryed is where things got sticky. Even though I read and reread the directions to glaze, it just didnt turn out like I expected. I am wondering now if I either 1 was not doing it correctly or 2 it just wasnt the right type of furniture for what I was trying to do. But, overall the mocha glaze did give it some brown undertones and really gave it some character.
Her eis the finished project. I really dont think this picture is good-it doesnt really do it justice at all. And, I wish I would have thought to take it BEFORE hubby put the tv back in . I'm not really sure what that brown stripe at the top inside is. When I saw this picture I immediatly ran in the living room to make sure I didnt miss an entire piece at the top, but I didnt. WEIRD!

Sunday, October 17, 2010
E-Mealz
These days I am all about organization. With 4 small children, going to school full time, and my many other duties, organization is the only way I feel half way sane on a day to day basis.
BC (Before Children) I use to sit down every week and plan out our menu and shopping list. It saved a lot of stress each evening when it came time to make dinner. Well, as time has gone by I have gotten worse and worse with meal planning. I still go grocery shopping, spend tons of money, and then stress every night because I cant figure out what to make for dinner. So, then a lot of times we end up eating out, which costs us even more money. And honestly, I just dont have the time to sit down and do this every week!
Well, seeing as our house payment went up almost $500 a month, we have to be more careful then ever about where our money is going. When I cam across E-Mealz I was a little intrigued, but a little skeptical at the same time. When I saw a coupon code for a discount (DAVE) I decided to take the plunge and try it out. The idea is simple. Each week they plan a menu for you, main dish and sides included. Each meal is very well rounded, and very easy to make. What makes it even better though, is they plan the menu based on what is on sale at the store you shop at. Hallelujah Kroger was on that list and away I went! We have been doing this for 2 weeks now and I am hooked. You would be surprised how much stress is lifted off of my shoulders because of one simple service. The stress relief alone if enough reason to jump right in, but we are saving A LOT of money in the process. It seems silly to spend $5 a month, but the money that we save having a plan, shopping the sales, and not going out to eat way over shadows that measly $5.
Check them out!
Fleece Winter Hats
When I saw this post at From An Igloo I immediatly wanted to rush to the fabric store, grab some fleece and get sewing! It took me a little longer than I cared to get around to making them, but seeing as we are still in the 80's here during the day, I'm pretty sure I got them made in plenty of time for winter!


These were surprisingly easy to put together. The hardest part for me was getting the dinosaur spikes onto Aiden's in the right postitions. I got both of them done in one afternoon WITH all 4 kids running around, so it cant be too bad right?
They LOVE them. Kylie went to bed with hers last night and has already adorned it this morning. Hopefully, they will make it to winter!
BUT...when I saw this for $4 in our Target ad this morning...
My heart did drop a little. Oh Well! I still think mine are cuter AND mine cost probably $4 TOTAL for the two WITH fabric left over! I might even have enough to make two mini ones for the babies =)
Friday, October 15, 2010
Pregnancy and Infant Loss Remembrance Day

October 15th is Pregnancy and Infant Loss Remembrance Day. Oh how I wish so many of us didn't have a connection to this day. How I wish nobody had to feel the pain of the loss of a child, whether they ever got to hold that child in their arms or not- the pain still runs deep.
Before haveing our sweet Aiden 5 years ago, I experienced 5 miscarriages with one of those being a twin pregnancy. SO, in total I have lost 6 babies. It was a very rough time not only for myself, but also for my husband. Please remember all the parents and families that have lost children, whether during pregnancy or after, and please pray that they know peace.
Halloween Treats and Fall Decor
I really am in a crafty mood today. I know I have a pile of housework to do, but craft time is a priority right? The first thing I made was for a large order I had on etsy. These little treat bags are a cinch to make and are great to give for party favors or just to hand out to friends. I haven't read the poem out loud in my house- remember I have a 5 year old little boy-enough said!

Did I mention this was a large custom order? Well, let's just say after I finished these I was....well....pooped! (I know...I know...I should be a comedian huh?)
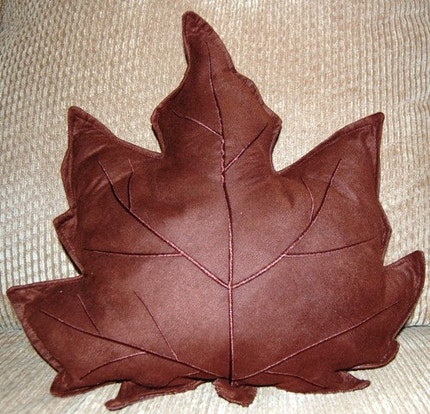
So, I made this gorgeous fall throw pillow. As soon as the kids saw it they were throwing it around the house having a ball with it. These are also super easy to make and make a great addition to the other pillows they throw in the floor and jump on. Isn't it more fun to have a pile of "leaves" to jump in?
Basically all you do its take this simple placemat I picked up from Walllie world, rip open a seam, stuff it full, and sew it back up. I told you it was easy, didn't I?

Did I mention this was a large custom order? Well, let's just say after I finished these I was....well....pooped! (I know...I know...I should be a comedian huh?)
So, I made this gorgeous fall throw pillow. As soon as the kids saw it they were throwing it around the house having a ball with it. These are also super easy to make and make a great addition to the other pillows they throw in the floor and jump on. Isn't it more fun to have a pile of "leaves" to jump in?
Basically all you do its take this simple placemat I picked up from Walllie world, rip open a seam, stuff it full, and sew it back up. I told you it was easy, didn't I?
Since I am on a roll today, I might pull out the sewing machine and work on a couple sewing projects I have been wanting to do. Until next time.....
Thursday, October 7, 2010
My Sweet Baby Boy
I know everyone says it, but kids really do grow up too fast. It really does seem like just yesterday that I was haveing miscarriage after miscarriage and then our sweet Aiden came along. Now today is is turning 5! Can you believe that? I can't! How can my sweet baby boy be 5 years old now? He will be starting school tommorow, driving next week, starting college next month, and married by next year! My heart hurts! But, it does rejoice in the fact that this precious boy is growing up to be a wonderful person, he does have his moments (he gets those from his daddy's side of the family!) but, overall he is a extremely smart, loveable little man and I can not wait to see how God uses him in his life.

In other news, please pray for our foster care babies, they need it right now. We have one that is getting ready to go to court for a permancy planning hearing in 2 weeks with a caseworker change this week. I have a feeling things might not be too good with a change like that, but we will make it work. OUr caseworker is being brought in for court, thankgoodness-even though she is coming kicking and screaming =). And our other baby, well lets just say we dont know what it going on with his case any more. We know God has a plan for these sweet babies and even if it is hard for us to understand, we have to believe and know that the RIGHT thing will happen in their lives. And, on top of all of this sweet baby boy was just given a diagnoses of a whole slew of allergies, a whole other world we are going to have to learn now.

In other news, please pray for our foster care babies, they need it right now. We have one that is getting ready to go to court for a permancy planning hearing in 2 weeks with a caseworker change this week. I have a feeling things might not be too good with a change like that, but we will make it work. OUr caseworker is being brought in for court, thankgoodness-even though she is coming kicking and screaming =). And our other baby, well lets just say we dont know what it going on with his case any more. We know God has a plan for these sweet babies and even if it is hard for us to understand, we have to believe and know that the RIGHT thing will happen in their lives. And, on top of all of this sweet baby boy was just given a diagnoses of a whole slew of allergies, a whole other world we are going to have to learn now.
Wednesday, October 6, 2010
Another Banner
Did I mention that I LOVE Fall decorations? Well, since I sold my Boo Banner that I made last week within a few hours of listing it on my etsy shop, I had to make another one. I decided to go for more of a general Fall theme with this one. It is beautiful hanging from my bar! Again, I used Pink Paislee Amber Road paper from my embarrisingly huge stash and my trusty Cricut and it was made in no time.

Tuesday, October 5, 2010
New Obsession
My name is Amber and I have an addiction.
An addiction to felt food! This is the cutest stuff I have ever seen. It makes me want to rummage through my daughter's room and throuw away all of the plastic and wood food she has and replace it all with this soft adorable felt pieces. The first things I made are a carrot (which my husband says is larger than life), and eggplant, and a candy corn just becuase it is October! I am just learning and I think after these 3 items I have got the hang if it and see many more items coming soon!


An addiction to felt food! This is the cutest stuff I have ever seen. It makes me want to rummage through my daughter's room and throuw away all of the plastic and wood food she has and replace it all with this soft adorable felt pieces. The first things I made are a carrot (which my husband says is larger than life), and eggplant, and a candy corn just becuase it is October! I am just learning and I think after these 3 items I have got the hang if it and see many more items coming soon!
New Design
So, what do you think of my new blog design? I am extremely happy with it. A big thanks goes out to CariCreates Etsy Shop for the design!
Friday, October 1, 2010
BOO Banner
OK, OK, I know I said I was moving on to non-scrapbooking projects, but I had to make this up. I LOVE the fall. I love the cooler weather, the pumpkin farms, of course the food, and the decorations! We were getting out all of our fall decorations today and I thought a banner would be the perfect touch. This banner was super easy with the use of my trusty Cricut. I used papers from Pink Paislee Twilight I had leftover from last year, and in less than an hour, a perfect Halloween decoration!

Thursday, September 30, 2010
New Day...New Direction
So I know it has been like FOREVER since I posted. I have really been trying to reevaluate what I want to do with my "Craft Life" since I closed the scrapbook store. While I love scrapbooking and always will, there are SO many other projects I want to do as well. So many in fact, that there is not enough time in the day to get my chores done and do them all! So, with that being said, I have hung my scrapbook designer hat up for a while and am going to focus on these other crafty projects, both for myself and for my etsy shop. (I need to keep a little bit of business action going to pay for my habits!)
So, from now on you will be seeing a plethora of projects and ideas. I will be posting tutorials on some, maybe some recipes, some kid activities, whatever floats my boat for that day! I hope you all enjoy the new direction I am taking and continue to follow along.
So, from now on you will be seeing a plethora of projects and ideas. I will be posting tutorials on some, maybe some recipes, some kid activities, whatever floats my boat for that day! I hope you all enjoy the new direction I am taking and continue to follow along.
Monday, August 9, 2010
New ScrapPlay Challenge
Do you have a favorite summer tradition? A trip or outing you really loved this year? If so then start scrapping! E-mail your layout to Noelle at scrapplay@gmail.com by Friday, August 13, 2010, 3pm EST and you could win some great products for your summer pages. She has put together a cute kit made of Colorbok Friendly Forest products. They’re great for summer layouts about camping out, nature hikes, zoo visits, and so much more. So get to work, folks!
Here is my summer project I made for inspiration. This album is super easy to make and makes a great impact. They are fun gift ideas as well.


Here is my summer project I made for inspiration. This album is super easy to make and makes a great impact. They are fun gift ideas as well.
Can you tell what this album is made out of? It is a pair of flip flops I picked up at the Dollar store!
Monday, August 2, 2010
Silhouette Giveaway!
I am an avid reader of The Idea Room Blog. She always has some of the greatest craft ideas around. Right now she is haveing a giveawy of a Silhouette! Can you believe that! Head on over and enter for your chance to win!!!
Friday, July 23, 2010
"Tooth" Tooth Fairy Pillow


Tuesday, July 20, 2010
Home Sweet Home
I am finally back! While I had a great time, it is always nice to be home to your own bed (especially when going 16 days with hubby and a 4 year old in a double bed!) The trip to Philadelphia was awesome! We took our time getting there since it was an 18 hour drive and stopped at a lot of fun places. We went to the Knoxville Zoo, and then stayed a bit in Pigeon Forge. Once we got to Philadelphia I was extremely happy we decided to park our car in a garage and use public transportation-I surely would have gone crazy navigated around in the absurd traffic! On our way to hotel we had already practically been run over by a trolley-it was terrible!
Here are a couple of my favorite photos from the trip


Here are a couple of my favorite photos from the trip


Of course I have TONS more to share, but I will wait and show then to you on layouts later, because we all now how caught up I am with my scrapbooking =)
So, now that I am back I have jumped back into my Motivated Moms planner full swing. If you are a busy mom and do not have this you are missing out! It is amazing! My house has never felt so clean and organized EVER, and this is coming from me now with 4 kids! These wonderful ladies have laid out a daily system for you to get your house in order and keep it that way. I love how spending just a couple hours each day (sometimes not even that) can make your house stay so spectacular! For only $7 you can download and print a chore list… it details a few chores to do every day of the year, and cycles through things like changing towels, cleaning the lights in your bathroom, cleaning the crumb tray of your toaster, and all sorts of things that are easy to let slide if you’re not thinking about them. Just what I need! I also love that they have an option to add daily bible reading to your schedule as well.
Tuesday, June 29, 2010
Sketch Challenge
We are haveing a sketch challenge over on the Scrap Play blog for a chance to win a set of Autumn Leaves alphabet stamps! (Open to US residents only). Submission is due Friday July 2nd.
This sketch is from Pagemaps. Their sketched are great and I find myself using them a lot when I am in a funk. They make scrapbooking easy peasy!
Here is my take on it. I think I might redo this, becuase I am just not super happy about it. I didnt have my pictures with me when I made it and then they pictures just didnt seem to go well with the page. I do not like to build pages without pictures. Do any of you like to do this? How do you make it work when you add pictures later?

Sunday, June 27, 2010
MIA and a new Scrap Play Project
So, I have been MIA for a couple weeks. First I had a week full of getting decorations ready for our church VBS. Then, it was VBS week which was AWESOME! The kids had a blast and met some new friends, even the adults were blessed greatly from the experience! Then...I have had a small issue I have been dealing with healthwise. Nothing that is a huge deal, but needs to be taken care of. I am fine now and have a small surgery scheduled for the end of July, then it will all be over!
My first assignment with Scrap Play was to create a Father's Day inspired project or layout. Nick and I are foster parents and it is amazing to watch him not only with our two children, but also with the foster children we bring into our homes. This process has blessed us tremendously and taught us so much. There is a whole other world out there that we do not know about. I wanted to make something for Nick to remind of of this special Father's Day. We have had Baby Girl for 6 months (she is 9 months old) and Baby Boy is 5 months old and we brought him home from the hospital 2 days after he was brought into this world. They are absolutly part of our family and at this moment, on this Father's Day, Nick has taken the role of their father as well.

Sorry I can not post their precious pictures, so I have added a heart on their face!
Part of Scrap Play's assignments is to create projects that showcase the photos and are not made with anything expensive. The base of this wall hanging is made from a wooden plain wall hanging I bought at our local Dollar Tree. I covered it with paper from the Pink Paislee 365 Degrees collection, and decorated it very simply to not take away from the photo of Nick and our babies.
Thursday, June 10, 2010
WooHoo!!! I was chosen....
...to be a member of the Scrap Play DT! Scrap Play is a new scrapbooking blog featuring techniques, money saving tips, new products, contests and challenges. I cant wait to jump right in and participate in some FUN FUN FUN challenges!
Wednesday, June 2, 2010
Swim Bag with Matching Towel

I have never been much of a sewer, but I saw the pattern for these, and I just HAD to try one out for Kylie. It was super easy once I figured out the exact way to cut it out and make it sized for Kylie. She LOVES it. Next on the list is a backpack style for Aiden. If anyone want the pattern for this, leave me a comment and I will be happy to send you directions. There is plenty room for a full sized towel and some goodies-now I dont have to haul everything myself!

Sunday, May 30, 2010
Weekend Project
Every since I saw the Robot project that the uber talented Jennifer Beason made, I have been dying to make one of my on to hang on my son's door. He LOVES robots and was super excited to see this one come to life!

This is made out of several differnet Maya Road Chip pieces cut and formed to make the body parts. The paper is Cosmo Cricket Joy Ride collection.
Wednesday, May 26, 2010
Altered Composition Books
Right after school starts every year I stock up on those black and white composition notebooks. Target and Walmart will usually mark them down to .10 each! They are great to alter and give as a simple gift. I have given them to teachers, as journals for military personelle, teens, and to friends as recipe books. They are super easy to alter and are very multifunctional.
Here is the latest one I made. This one is VERY simple. I didnt alter it much at all becuase the cover paper is all it needs. This paper was a specialty one that I found at Hobby Lobby on clearance. It has the greatest texture and was perfect for this badge I had!

Here is one more, again same kind of paper, so I felt that it didnt need anything else.
Beautiful and Easy Peasey!

Monday, May 24, 2010
New Layout

I Made this layout as part of a sketch challenge. I have never used cardboard on my layouts and have been wanting to try it out. Now that I got my geet wet, I have some ideas for a couple of future layouts I would like to do. I also used papers from Crate Paper Brook, I really like this line!
These pictures are from our trip to Petit Jean Mountain last year. I am TERRIBLE about including pictures of myslef in the kids albums, but I am trying really hard to use more lately. We had a great time and are looking forward to a half way cool day that we can go this year (it has been HOT HOT HOT this week!) It is about an hours drive so we take a picnic lunch and spend the entire day.
Friday, May 21, 2010
Easy Strawberry Jam

I made several jars of this Jam with our strawberries we picked. It turned out SO yummy! I will be making cards for each of the kids teachers for their end of the year gift to post soon. They will each get a jar of this along with the card.
(Disclaimer: This is how I personally make my Jam, there are many variations and many techniques people use. I am a novice canner and tend to do make changes so that my children can participate)
Step 1: After washing jars and lids, place in sink full of boiling water. Let stand in hot water until ready to use.
Step 2: Prepare a large pot with enough water to cover your jars later. Put on stove and bring to boil.
Step 3: Place in large pot: 4 cups crushed strawberries (Let the kids crush them with a potato masher),7 cups sugar, and 1/2 teaspoon butter (This is to keep your jam from getting too foamy). Bring mixture to a full rolling boil on high heat stirring constantly.(This is where the kids need to step back and let Mom or Dad take over as it could be dangerous for little ones)
Step 4: Stir in 1 pouch liquid pectin. Return to full rolling boil and boil exactly 1 minute, stir constantly.
Step 5: Remove from heat and ladle quickly into prepared jars, filling to within 1/8th" of top. Wipe jar rims, and cover with 2 piece lids. Screw bands tightly. Place jars in prepared boiling water. Water needs to cover jars by around 1"; add boiling water if needed. (I like to keep my tea pot full of boiling water at all times while canning).Cover, bring to gentle boil. Leave 10 minutes.
Step 6: Remove from water onto hand towel and let stand at room temperature 24 hours. Store in cool, dark, dry, dark place up to 1 year. Refrigerate opened jars up to 3 weeks (In my house 1 small jar only lasts about a week!)
Throw a decorative bow around the rim and it makes a great gift! We will be using these as our end of the year teacher gifts. And, because the kids helped in the process, it makes it a much more personal gift.
Monday, May 10, 2010
Strawberry Pickin...

Last Friday we had the chance to visit a local farm for the first time this year. We love to go out there every summer and pick fresh fruit and vegetables. The kids enjoy watching the bees and chasing the dog and of course-EATING the goodies! The farmer teased that he was going to have to weigh Aiden when I paid for our strawberries becuase he ate so many!
I ended up with twice as many strawberries as I intended to get. With 5 kids and 4 adults picking it didnt take long to fill our "little pails" as Kylie called them. So, Saturday morning I set off to make starwberry jam. This was my first attempt at jelly so I was a little nervous, but OH DID IT TURN OUT YUMMY! It is to die for! This will definatly be added to my list of yearly to-dos!
I needed to share my labors with my dear friend who went and helped pick, so along with her jars of jam I made her this card. The Cosmo Cricket Garden Variety papers were perfect for this card.

I simply did a search for a strawberry pattern, printed it out and traced it onto my cardstock (folded in half to make the fold in the card). After that I covered it in patterned paper and dressed it up a bit. I used a button made by London Tierney on the top. I just LOVE her buttons-she is amazing! The inside reads "for being a sweet friend" using the Cosmo Cricket Tiny Type Alphas.
Papercrafts happens to be holding a call for their Gallery Idol 2010 contest. You are asked to submit a thank you card, so I posted this one to the gallery. There is a lot of amazing talent over there, but I can hope huh?
Saturday, May 8, 2010
A Couple Layouts
This Friday night I went to a crop that was being held to raise money for an organization that is very dear to my heart. The CALL- Children of Arkansas Loved for a Lifetime. Their mission is to educate, equip and encourage the Christian community to provide a future and a hope for the children in foster care. It is a wonderful program that is doing great things in Arkansas and the foster care system.
It amazes me how much I get done in a 6 hour scrap-fest...NOT! I really enjoyed myself though and met a lot of great ladies that I hope to keep in touch with.
Here are thw two layouts I finished-Yes, I said two!


It amazes me how much I get done in a 6 hour scrap-fest...NOT! I really enjoyed myself though and met a lot of great ladies that I hope to keep in touch with.
Here are thw two layouts I finished-Yes, I said two!

Bazzill Cardstock, Crate Paper Brook Paper, Crate Paper Brook Sparkle Chip, My Mind's Eye Diecut, handmade button from London Tierney etsy shop, Twine

Ocotber Afternoon Farm Fresh Papers and Journal Tag
These flowers are so easy to make and make a big impact on your layouts. I will have to post a short tutorial on those later.
Tuesday, May 4, 2010
A Time for New Beginings....
My heart is very heavy and sad this morning. With much thought, prayer, and discussion I have decided to close SBKC. My life is so crazy hectic right now and I have never been more behind on my scrapbooking then ever before. I know that sounds funny doesnt it? How could someone who owns a scrapbook business be so behind? Well, it is because all of my extra time was spent searching for products, coordinating kits, running a message board, contacting the design team, etc.
In other news, I have 2 extra houseguests this weekend and Aiden is in Heaven! My sister got the chance to go to HAWAII with her oldest 2 daughters to celebrate their upcoming graduations. I am so jealous! So, for the next 2 weeks I get the honor of keeping her youngest 2 little boys. They are 6 and 5 and Aiden is loving every minute of it! He needs boys his age to play with and 2 weeks staright of non stop fun is right up his alley!
In other news, I have 2 extra houseguests this weekend and Aiden is in Heaven! My sister got the chance to go to HAWAII with her oldest 2 daughters to celebrate their upcoming graduations. I am so jealous! So, for the next 2 weeks I get the honor of keeping her youngest 2 little boys. They are 6 and 5 and Aiden is loving every minute of it! He needs boys his age to play with and 2 weeks staright of non stop fun is right up his alley!
Saturday, May 1, 2010
Fabric Album
Hi Everyone! I know, I am TERRIBLE with keeping up with my blog, so I am going to make a promise right now to do better-so you all need to hold me to it-OKIE DOKE!
Today I was very fortunate and was able to take a class with Donna Downey. I have to admit here that I was very spectical of paying a bunch of money for a class, but I thought-Hey, when will you ever have this opportunity again? Boy, was I surprised! Not only did I enjoy every minute of it, but I learned a ton! I never would have tried any of this on my own. I plan to utilize everything I learned both in my personal projects and maybe a few things in the SBKC kits as well!
I will post the completed album later, but here is a sneak of a couple of the pages I have finished. (Sorry for the not so great pics, I'm trying to post this in a hurry!)


Subscribe to:
Posts (Atom)