Saturday, March 17, 2012

Homeschool Weekly Wrap Up March 16th,2012

This week was a little off due to my sister and her 4 children visiting from out of town. We had great fun playing outdoors in the beautiful weather we have been having, played at the park, and going to the zoo.


Big Man and Princess where so excited to begin our first week of Tapestry of Grace and start their new grade level subjects that they begged me all weekend to "do school". We started our week on Sunday afternoon and finished up this Saturday. So, even with company for 3 days, we were able to stay on schedule and get everything done.


Princess- Even though I didn't care for the Language Arts portion of Sonlight when we did it last year, Big Man seemed to do well with my modified version of LA1, so I decided since we already owned it, I would do the same with Princess. She did really well with the "I Can Read" Book 1 stories since the words were familiar to her from the word ladder activities we did last year. She struggles most with the copywork and knowing how to keep everything in order when she rewrites it.
She also started ETC 1 and did awesome!

Big Man- This week was the beginning of some brand new curriculum for him. He thinks that FLL is way to easy and short right now, but I have thought it has been perfect. He struggled with the first narration we did in WWE, but once he got the hang of it, it was easy sailing from then on. His reading continues to improve every day. We choose books from THIS list that our library has. He reads one book per day to me or Dad and then documents it in his reading log. I have him write the name of the book and the author then he draws a picture of something he remembers from the book.


He started ETC Book 4. I had heard that it was best to skip this one and move on to book 5, but so far, no problems. I plan to just stick in there and see how it goes. We also began Beyond the Code with Book 1.

Princess- Started Horizons K this week. We also are doing the 2 week trial of DreamBox with plans to purchase the subscription through Homeschool Buyers Coop. Both kids have loved the program and I have been very impressed with the level of the content they are learning.

Big Man- Started Horizons Math 1, as well as Math Mammoth 1, and DreamBox. We made these alligators to reinforce the concept of greater than/less than and played a rousing game of war!


We learned about weather in science this week. We started a temperature log and discussed evaporation.

Our first week of TOG was great fun! We read several books about Ancient Egypt. They both loved making the cookie map of Egypt. I think the mountains tasted the best!

We had friends over on Friday that also started this week and made Egyptian Paddle Dolls.

Our read aloud this week is Little House in the Big Woods By Laura Ingalls Wilder. Snuggle time with Daddy is a must!

Thursday, March 8, 2012

Curriculum

2012 School Year Curriculum


Together


History and Geography- Tapestry of Grace Year One
Art/Music- Harmony Fine Arts Year One, Piano Lessons


Big Man
First Grade

Language Arts- Spelling Workout, Explode the Code (books), First Language Lessons Level 1, Writing With Ease , reading tons of books by grade level from library.

Math- Horizon 1, supplemented with Math Mammoth, and DreamBox Learning.


Princess
Kindergarten

Language Arts- Early readers, sight word practice, cvc words, etc, and Explode the Code.

Math- Horizon K supplemented with DreamBox Learning.


Tuesday, March 6, 2012

Why We Homeschool

I know that I took a very long hiatus from blogging, but have finally decided to come back. Why? Well, I thought it might give me the kick in the pants I need to document our lives. Not only our day to day activities, but also our homeschooling journey. So, to kick off my return to Blogosphere, I thought I would start with the basic "Why We Homeschool".

We homeschool for one reason-Because that is what is right for our family. Notice I didn't say that it is right for every family, I said it is what is right for OUR family. When we were considering homeschooling our children, Hubs asked one thing- Can we provide a better education for our children at home than they can recieve elsewhere? The answer was a definite yes. We want to teach our children Biblical truths, we want to protect them from the outside world (to some extent) on our terms and no one else, and mainly because we want to provide a more rigorous education than what is provided at many of our local schools.

Friday, June 17, 2011

Time 4 Learning


Time 4 Learning is a convenient online homeschool curriculum that combines education with online interactive fun. They provide lessons for preschool age thru eighth grade using a combination of animated lessons, activities, worksheets, and quizes or tests. Some people use Time 4 Learning for their complete homeschool curriculum but we have been using it as an enrichment to the curriculum we already use.

We have been using the preschool, kindergarten, and first grade levels that include subjects such as language arts, math, and science. The only drawback I have seen with Time 4 Learning is the monthly fee for students. With 2 children who love every minute of their time spent on the site, it does add up. However, we have justified the cost and added it as one of our homeschool expenses based purely on the fact that they are learning, they are enjoying it, and they are learning computer skills in the process. They do provide discounts for additional students in a family.

We have been very please with Time 4 Learning. For those who are interested, we did find out that the public school system uses a program from the same company designed for classroom use, and that the materials are aligned with our state requirements.

Right now Time 4 Learning is providing a 14 day money back guarantee. So I suggest everyone with homeschoolers try it and see how it works with your family, and if you are anything like us-you will find a way to add it into your schedule and budget!

Time4Learning is an online education program that can be used as a homeschooling curriculum, an afterschool tutorial or for summer learning. As a member, I've been given the opportunity to share my experiences. The content in this review was not written by Time4Learning. While I was compensated, the opinion is entirely my own.


Friday, June 3, 2011

Finally! The Bar Stool......

These have been finished for a long while now. My life got crazy busy and I just have not had time to do any crafty projects or posting. I am ready to jump back in and get my hands dirty now!

After adding the workboxes to our dining room for homeschooling, I no longer had room for all 3 I had made, so I now have 1 unfinished bar stool in our basement. Im a little disapointed in that, but alas the kids eduction comes first!

So, I know we have been waiting FOREVER on these! Hope you like them!


My computer is being weird! So, everybody turn your head completely to the side!

I got the pattern from Ana White. I have talked about her site a while ago. It is amazing! It is full of inspiration and will make a wood worker out of anybody. I started with a doll bed for a Christmas gift and this was my second project.

Coming soon....a headboard I made from cabinet doors!

Friday, March 25, 2011

My Weekend Project

The kids and I will be studying Medieval Times soon, so when I saw this Card Table Castle Fort Pattern on Etsy I just knew I had to make it for the kids! This etsy shop has a ton of very adorable ideas to spark tons of imagination in your kids play.

I will say that overall the pattern and idea were great, but the directions were very hard to follow. For someone who does not have much experience with sewing, I think it might be very confusing. There were a lot of areas where I had to "make it work" so to speak!

Sorry for the poor pictures of this. I could not keep the kids away from it to take any at all. They were running around and hoping in and out as fast as I was snapping pictures!

Front with Drawbridge

Side-These windows are the most adorable thing I have ever seen! The bugs were not included in the pattern, I had some fabric I cut those from and added them myself.

Back with a scary dragon in a cave! I added a nose, a bottom jaw, and the tongue to him which was not included in the pattern.

Other side!

Monday, March 14, 2011

Bar Stools.....

I haven't forgot to post the final pictures of the bar stools I was going to make! I decided to wait until hubby was home just in case there was a mishap with my first time using a saw. Fortunately there was not! I had a small problem with the circular saw at first, but cruised along with the miter saw!

Here is the dilemma I now face...I LOVE the stools. I also LOVE the cushions I made. However, I do NOT love the cushions on the bar stools. I am so disappointed and at a loss for what to do. The fabric choice for the cushions is just way more formal than the actual bar stool itself is. I am frustrated with the money I spent on the fabric and hate to purchase something else, but at the same time I don't really want to leave them the way they are now. What I think I am going to do first it cut down the size of the seat (right now it hangs off the edges about 1". I am hoping that if the seats are much smaller the cushions will not stand out so much? I don't know....suggestions anyone????

Sunday, March 6, 2011

Workboxes

I have jumped on the workbox bandwagon and could not be happier! I am loving the organization of it all as well as the excitement in the kids!

Here's how I make it work:

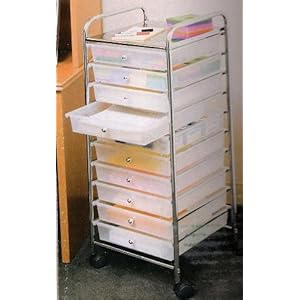
I liked the idea of using drawers. First reason why is because I have 2 little people running around, and second because we do school in our dining room and I wanted it to look at least ok with our decor! I bought these 10 Drawer units from SamsClub for around $33 each. The one here doesn't even look as good as mine, same unit but mine is in bronze to match our decor.


Next, I got out my laminator and got busy making numbers for the drawers. I used numbers from Confessions of a Homeschooler, which is an awesome homeschool blog if you haven't ever visited it before! I used the Transformer numbers for Little Man and the Princess numbers for my princess of course ;) I printed, laminated, cut out, and used sticky velcro on the backs and then onto each drawer.

What is in our Workboxes?

We first have group time that consists of Bible reading, Prayer, Pledge of Allegiance, Days of the Week Song, Months of the Year Song, and our Readers. Our Readers come from Sonlight Curriculum.

Then they work on their boxes. Here is an example of things I include:

  • Little Man's Spelling words for the week. He writes and reads these each day and then we take a spelling test on Fridays.
  • Explode the Code

  • Handwriting Without Tears 
  • Little Man will have a book to read to me.
  • Horizons Math

  • Geoboards
  • Boggle Jr 
  • Assorted Arts and Crafts: Modeling Clay, Painting, Markers, Letter of the Week craft for Princess, etc.
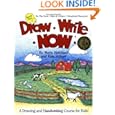
  • Draw Right Now 

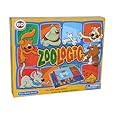
  • Zoologic

Obviously all of these things are not done every day, and this is far from everything I might include. I find myself giving the kids things to do during the day that they thoroughly enjoy, but I might not have thought of pulling out before. I also might include a fun snack in one box which they love to open up and see.


Brag Post!

Ok, so I forget a lot of the time to check my comments. Mainly, becuase it amazes me that my meager little blog would draw any readers. I really want to be better at blogging. I have so many projects to share! How do you all take the time to do it? Really? I need suggestions!

SO...I was going through comments today and discovered that I was featured on CraftGossip! Can you believe it! They did a post on Cool Photo Display Ideas and my Inexpensive Wall Art post was pictured!

This inspired me greatly to take more time to post my ideas and projects. I am SO inspired by all of your ideas and even if one person is inspired by mine-well that makes it all worth it!

Wednesday, February 2, 2011

Nervous?

Does someone want to come over and supervise while I use my circular saw? I know this will probably crack some of you up, but my Christmas present this year was power tools. I recieved not only a circular saw, but also a jig saw and I cant wait to use them. I have SO many projects I want to do and not enough time at all!

Right now I have the materials purchased to make a set of 3 bar stools for my kitchen counter. I decided I just can not pay over $100 a piece when I can just make them myself for much less. Well, the problem is-I have never used a saw before and frankly, as excited as I am, Im a little nervous to do it while I am home alone or even with the kids here.

So, do I wait until hubby is home, or just go for it and keep the phone close by?

Tuesday, February 1, 2011

Sonlight Core K Week 3

We had a great time traveling to Ancient Egypt this week. As always, we extended 1 days worth of reading into a weeks worth of fun and activities!

Books Used-both of these were used mainly for the pictures, we didnt read much of the actual content.
Cleopatra by Diane Stanley
Tutankhamens Gift by Robert Sabuda


We didnt do a "traditional" lapbook this time, I made a "book" from construction paper. I took 2 sheets of paper and stapled them together on the short end then folded each page in half toward the inside.

Activities
-PBS Special Video "Pyramids"
-History Pockets This is gearded for an older age group, but we adapted it for us and just didnt use everything. There is a lot of information in here, including this really neat description of the different layers of the mummy and the sarcophagus. The kids really enjoyed wrapping there "person" up in the gauze.


 -Paint the Nile River down a large piece of construction Paper. We discussed the importance of it and added some materials from the history pockets beside our river. Yes- I have messy painters!

-Apple Mummification Experiment This one is still "mummifing" but here is the beginning picture!


-Build a pyramid from legos. This was really great for Aiden to use problem solving and  math skills , something I did not even expect when I gave him the instruction to do it. He had to start over a couple of times until he figured out the process, and it turned out great. (The people are apparently gaurding the mummy inside-I love the imagination!)

-Egyptian Paper Dolls. I got thses from the History Pockets download, but also saw some great printables HERE, although some of the clothing in this download does not go along with what we read they actually wore. I had the kids color them and then I laminated them for playtime. (BTW- LOVE the laminator!)


Tuesday, January 25, 2011

Sonlight Core K Week 2

Ok, so I know I am a little late posting our week 2 projects. I honestly did not do hardly any school with the kids at all last week due to some issues we had going on here at our house. But, I guess better late than never =)

If you are doing the 5 day a week curriculum, you have reading scheduled on Day 5 of science on  the topic of Frogs for the next several weeks. I personally did not think the kids would remember that much just reading a couple of pages one day a week for several weeks, so we turned the entire Frog theme into a lapbook.

I am always amazed at how much I learn right along with the kids! Did you know that the smallest frog is about the size of your finger nail, while the biggest is the size of a cat! Really? If I met that from on a dark night I think I would have a heart attack!

Extra Books:
Frogs By Gail Gibbons
Growing Frogs By Vivian French
The Frog Prince

Lapbook Compnents:
-og words from Homeschool Share
5 Green Speckled Frogs Poem from Homeschool Share
Frog Life Cycle
Frog Prince Coloring Page

Other Activities:
Watched the Princess and the Frog movie
Grow a Frog- I really wanted to do this, but just did not want to spend the money to purchase a kit. We have many ponds in our area were you can catch tadpoles when it is warmer, so we might come back to this later.
Frog Tracker The kids loved this and even insited on calling Daddy to let him hear their new "croak" music!


We skipped the Living Long Ago and the Children's Encyclopedia reading on Ancient Egypt this week and will encorporate that with some extra activities into next week.
 
Stay tuned for Valentine activities next week as we explore a little on this holiday!

Friday, January 7, 2011

How Could I Forget?

I was looking through some pictures this morning and realized I had forgot to post one of the projects I made for Kylie for Christmas this year. It was a huge hit thanks to Ana White! I dont know how I did not know about her site. When I first found it I was in awe, I spent WAY too much time on there drooling over WAY to many projects. Since Kylie was asking for a big girl doll I knew this doll bed would be the perfect accompianment!


This was my very first time to build anything from wood, and I can tell you the plans were very easy to follow. This inspired me to build MANY more projects. The nice man at Home Depot cut most of the boards for me as I did not have a saw of my own and I went to work.

The mattress was cut from a piece of foam I bought from Hobby Lobby. I made a fitted sheet, pillows, and blanket.

AND....guess what I got for Christmas after this beauty was made? I got my very own Circular saw and Jigsaw. Hubby is scared to death I might loose a finger-let's pray that never happens! Now, how do I narrow down which project to build next? Should I dive right into the Playhouse Loft Bed for Kylie's room and to complete the room Dress Up Storage, Grace's Town, and Kitchen? Or start with something a little smaller like the Corner Cupboard, or the Locker Cabinet?

Thursday, January 6, 2011

Inexpensive Wall Art

I have a huge empty space on one of the walls in my living room that I have been looking for the perfect art for. Well, I came to the conclusion that I just couldn't afford a large enough piece of art for that space. SO, I came up with something else. Now, this is not my idea, it is all over the blogosphere, but I did make it my own by adding pictures of my kids and some "family rules". I did not include step by step pictures because it is SO easy!

Here's what you do:

I purchased a piece of plywood and cut it into 9 12x12 squares (your local hardware store might even do this for you if you ask nicely!)

I painted the edges of my plywood squares with a chestnut spray paint, I have also seen this done with ribbon.

Use a spray adhesive to adhere a 12x12 piece of scrapbook paper to each square. I tried to use modge podge at first but it bubbled and I wasnt happy! On 3 of the squares I had 2 of my favorite pictures blown up to 12x12 and a Subway Art file I got from Sassy Sanctuary.

Attach pictures hangers to the back and VIOLA! Instant and CHEAP wall art! I have to say...it looks GAWGEOUS!!!!!!!!


Now, when hubby gets home he can see just what I was trying to explain to him. He asked me over and over why I was hanging squares of plywood on the wall. You would think after all this time being married to me he would learn!


Tuesday, January 4, 2011

Sonlight Core K Week 1

As soon as our box from Sonlight arrived the kids were begging to get started. We really enjoyed our first week of homeschool!
Supplementing with the curriculum this week, to go along with the Usborne Children's Encyclopedia reading on dinosaurs, we will be completing a small unit study to extend more on that topic. I borrowed some of the ideas from Homeschool Share and Enchanted Learning to complete a lapbook on Dinosaurs. While I am on the topic of Enchanted Learning, this is a subscription site. I debated over and over again on paying the fee to join ($20) because of the wealth of information you can find for free online, but the more I searched the more I decided that this site is well worth the $20 subscription fee. They offer a ton of materials for homeschoolers and teachers alike.

Books Used
If the Dinosaurs Came Back by Bernard Most
Bones, Bones, Dinosaur Bones by Byron Barton
Raising Dragons by Jerdine Nolen
Dinosaurumpus! by Tony Mitton
The Magic Schoolbus In the Times of Dinosaurs

Homeschool Share recommends the book What Really Happened to the Dinosaurs by John Morris and Ken Ham, I just want to add here that I did check this book out at the library and was very disappointed. Not only was it confusing for the kids to understand, I didn't understand much of it either. It contradicted what we had read in the Usborne Encyclopedia and it talked a lot about Evolution and how the dinosaurs lived over 100 million years ago. After reading just a couple of pages, we decided to skip it all together.

This was our first lapbook experience, and the kids really seemed to enjoy it. It was really great how they were able to share what they learned with Daddy afterwards.

Materials Included
  • Read the creation account in Genesis 1:1-31. List what God made on each day and determine what day God made dinosaurs. Flip Flap Book
  • Discuss Paleontology and completed large dinosaur puzzle after going on a "hunt" for the pieces.  Paleontologist matchbook.
  • Make a paper mache Dinosaur egg and then hatch it later (mommy snuck in a toy dinosaur when they werent looking)
  • Discuss dragons and dinosaurs.  How do the "dragons" in this story seem like dinosaurs?
  • Dinosaur Book We colored the pictures on the first page and cut them all out to make our cover, then discussed and colored the other sheets to include in the lapbook.
  • Dinosaur Pop Up Book
I have a photo printer at home, so any of the "big" projects like the fossils and the egg, I printed small pictures for them to include in their lapbook as well.

And here are the pictures of our completed lapbooks


Also, beginning this week, we will start collection items to make a Diorama of the Boxcar Children later. As we read the book we will note things they had in the boxcar and what the area around them was like. We also have The Boxcar Children Cookbook and will be making some of the recipes as we come upon the different foods they ate in the book.

For Science, we were very lucky that the Lunar Eclipse happened around the same time we read about the Earth's rotation, we viewed a video of that Here on the NASA website.


Monday, December 20, 2010

Homeschool Beginnings.....

After much prayer and discussion we have decided to homeschool. I am very excited about the curriculum I have picked out. We chose to use Sonlight Core K and supplement with additional activities to extend the core out. After searching and searching and searching for a website that had supplements to Sonlight Core K with no avail (I did find a couple, but they were not what I was looking for) I decided to take the plunge and use resources from all over and do it myself. So, along with our normal crafty posts (which have been severely lacking lately-sorry) I will be posting our homeschool adventures in hopes that it might help someone else as well! I hope that anyone who is considering homeschooling, who is currently homeschooling with another curriculum, or who is using the Core K will enjoy what we are doing and give me feedback and ideas as well!

Monday, November 22, 2010

Allowance and Banks

A few years ago hubby and I were sitting around discussing our kids and how we wanted to teach them about the value of money. We completely agree with the idea of a reasonable allowance to teach them some basic money skills. As the kids get older they tend to ask more and more for "things". I can not count on both hands how many times I have been asked to purchase something with which my answer has been "No, I don't have any money", with a response from Aiden "Well, use your debit card!". This is NOT how I want my kids to think about spending and the use of money. I only wish my debit card was that magic!

A while ago I saw this bank that I just thought was PERFECT for teaching them some very basic money skills. It had 3 sections, one for saving, one spending, and one giving. I was excited! I just knew this would be a great idea for our little beginners! Well, when we decided to start I ran off to this particular store to purchase one of those banks, and came back empty handed. They did in fact still carry it, but being the frugal mommy I am, could not in my right mind imagine paying the $20.00 they were selling it for! Especially since the little stickers were barely hanging on by a thread. I could make something with the supplies I had on hand and it be MUCH cuter! At this point, just imagine the eye rolling from hubby that ensued! I was on a mission!

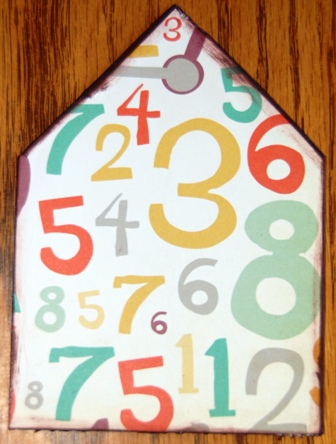
The first thing I needed was a template. You would think a simple house template would be easy to find with an Internet search, well not as easy as I thought, so I came up with one of my own. I had big ambitions at first of this cute little chimney on top of each house, but I quickly decided these houses did not need a chimney. You can add that if you wish =) I printed this at 120% on my printer so that it just fit on an 8.5x11 sheet of paper.

Cut out your template and then cut each individual piece onto a sheet of chipboard.


Enlist a little help from your children at this point. Mine are always eager to get a little messy with mommy! I use Aleene's Tacky Glue on EVERYTHING! The kids went hard to work dabbing a little glue (or a lot in their case) onto each chipboard shape. Just an FYI that it took me a long time to figure out- I used to purchase this glue at my local scrapbook store, or box chain like HL or Michaels until I found the giant bottle at Walmart for less than half the price! I will never buy it anywhere else again.
Please don't judge the messy house in the background!

Place each chipboard piece down on the BACK of your favorite piece of scrapbook paper. If your paper has a design you want to face in a certain direction, now is the time to check your positioning!

Using your scissors, cut each piece out. I don't worry too much about perfection at this point. Sandpaper does wonders for rough edges and gives it a little character!

I do, however, like to ink the edges of most everything. I think it gives it a finished look that makes the piece pop. I prefer the tiny Cat's Eye ink pads, they are inexpensive and can be purchased in many colors.

Now, I don't have any pictures of the next step, but I think it is pretty self explanatory. On one of your ROOF pieces, cut a rectangle with your exacto knife large enough to "deposit" and remove your money. I started to try to rig up some type of removable bottom, but figured since this was going to be handled by my children, it needed to have as few removable pieces as necessary.

Use your Aleene's glue on each edge of the chipboard and press them together. You only have to hold it for a couple minutes before the glue dries enough for you to move on to the next piece.

Decorate it with any embellishments or stickers you have on hand, and here you go!


Aren't those tiny clothes pins the most darling thing you've ever seen? I LOVE them!